hiking

2017 in Review

My resolution for 2017 was to not only to get outside more but to do more backpacking and camping. As the year wraps up, I'm happy to say that I've met that goal and then some. I started Trial by Trail in March of this year as a way to document my trips and hopefully to help and inspire others to plan their own. I have learned so much this year and I am looking forward to a 2018 full of adventure. 

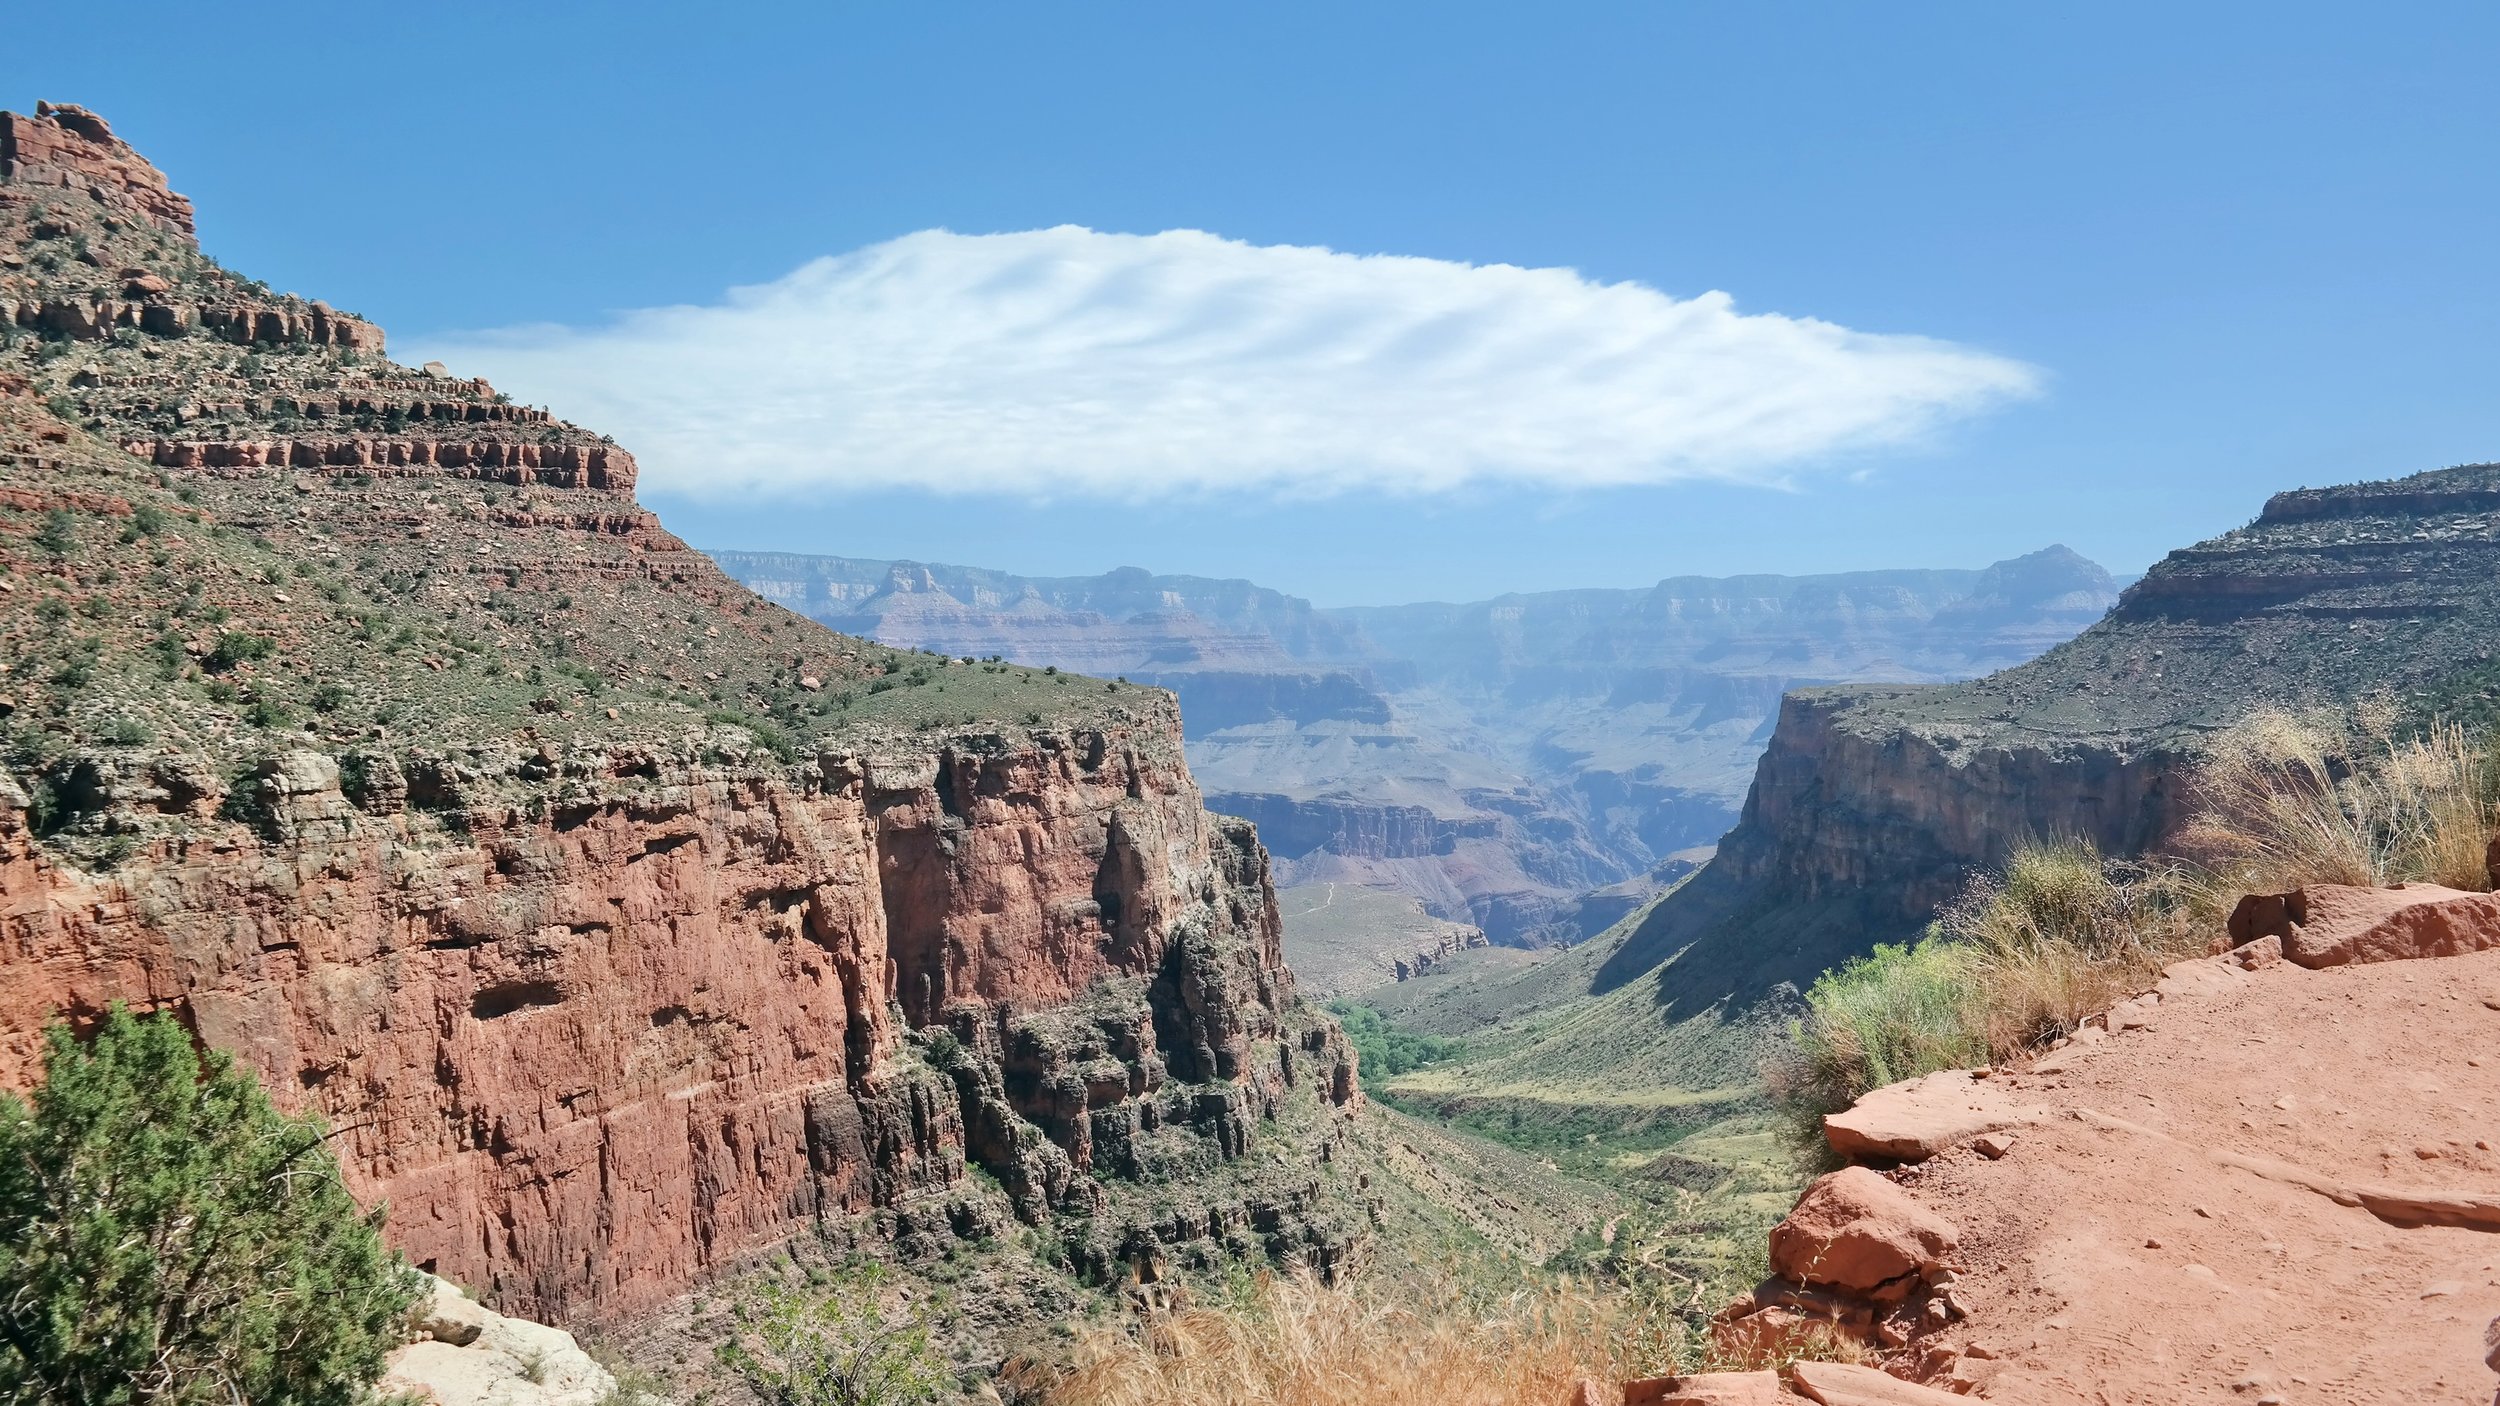
Best Overall: Grand Canyon Rim to Rim 

Ribbon Falls 

The Grand Canyon Rim to Rim hike is 24 miles with roughly 10k feet of elevation change. We hiked North to South over three days in June, spending two nights at the bottom of the canyon. Temperatures reached 117 degrees Fahrenheit, but we stayed cool by swimming at Ribbon Falls and in Bright Angel Creek. 

There is just something about the Grand Canyon. The top of the rims offer amazing views, but the bottom of the canyon is what I found the most astounding. The absolute lack of noise from cars and people was something I had never experienced before. As you hike to the bottom of the canyon, it's like walking through time. I have never felt my own impermanence more strongly. 

Click here to read more about our Rim to Rim hike and how to plan your own. 

Passing by some mules headed down into the canyon on our way up to the South rim.

Most Unique: The Narrows Top Down

Aptly named, the Narrows is the narrowest part of Zion Canyon and is one of the most popular hikes in Zion National Park. The canyon walls reach over 1,000 feet tall and only 20 to 30 feet wide in some places. The Virgin River runs through the canyon so the hike is mostly through flowing water that generally ranges from ankle to waist deep (and sometimes deeper).

We were unable to obtain an overnight permit for this hike so we did all 16 miles from Chamberlain's Ranch to the Temple of Sinawava in one day. Armed with dry pants, dry bags, canyoneering shoes, and really big walking sticks, we finished the hike in about 9.5 hours.

Click here to learn how to plan your own Narrows hike. 

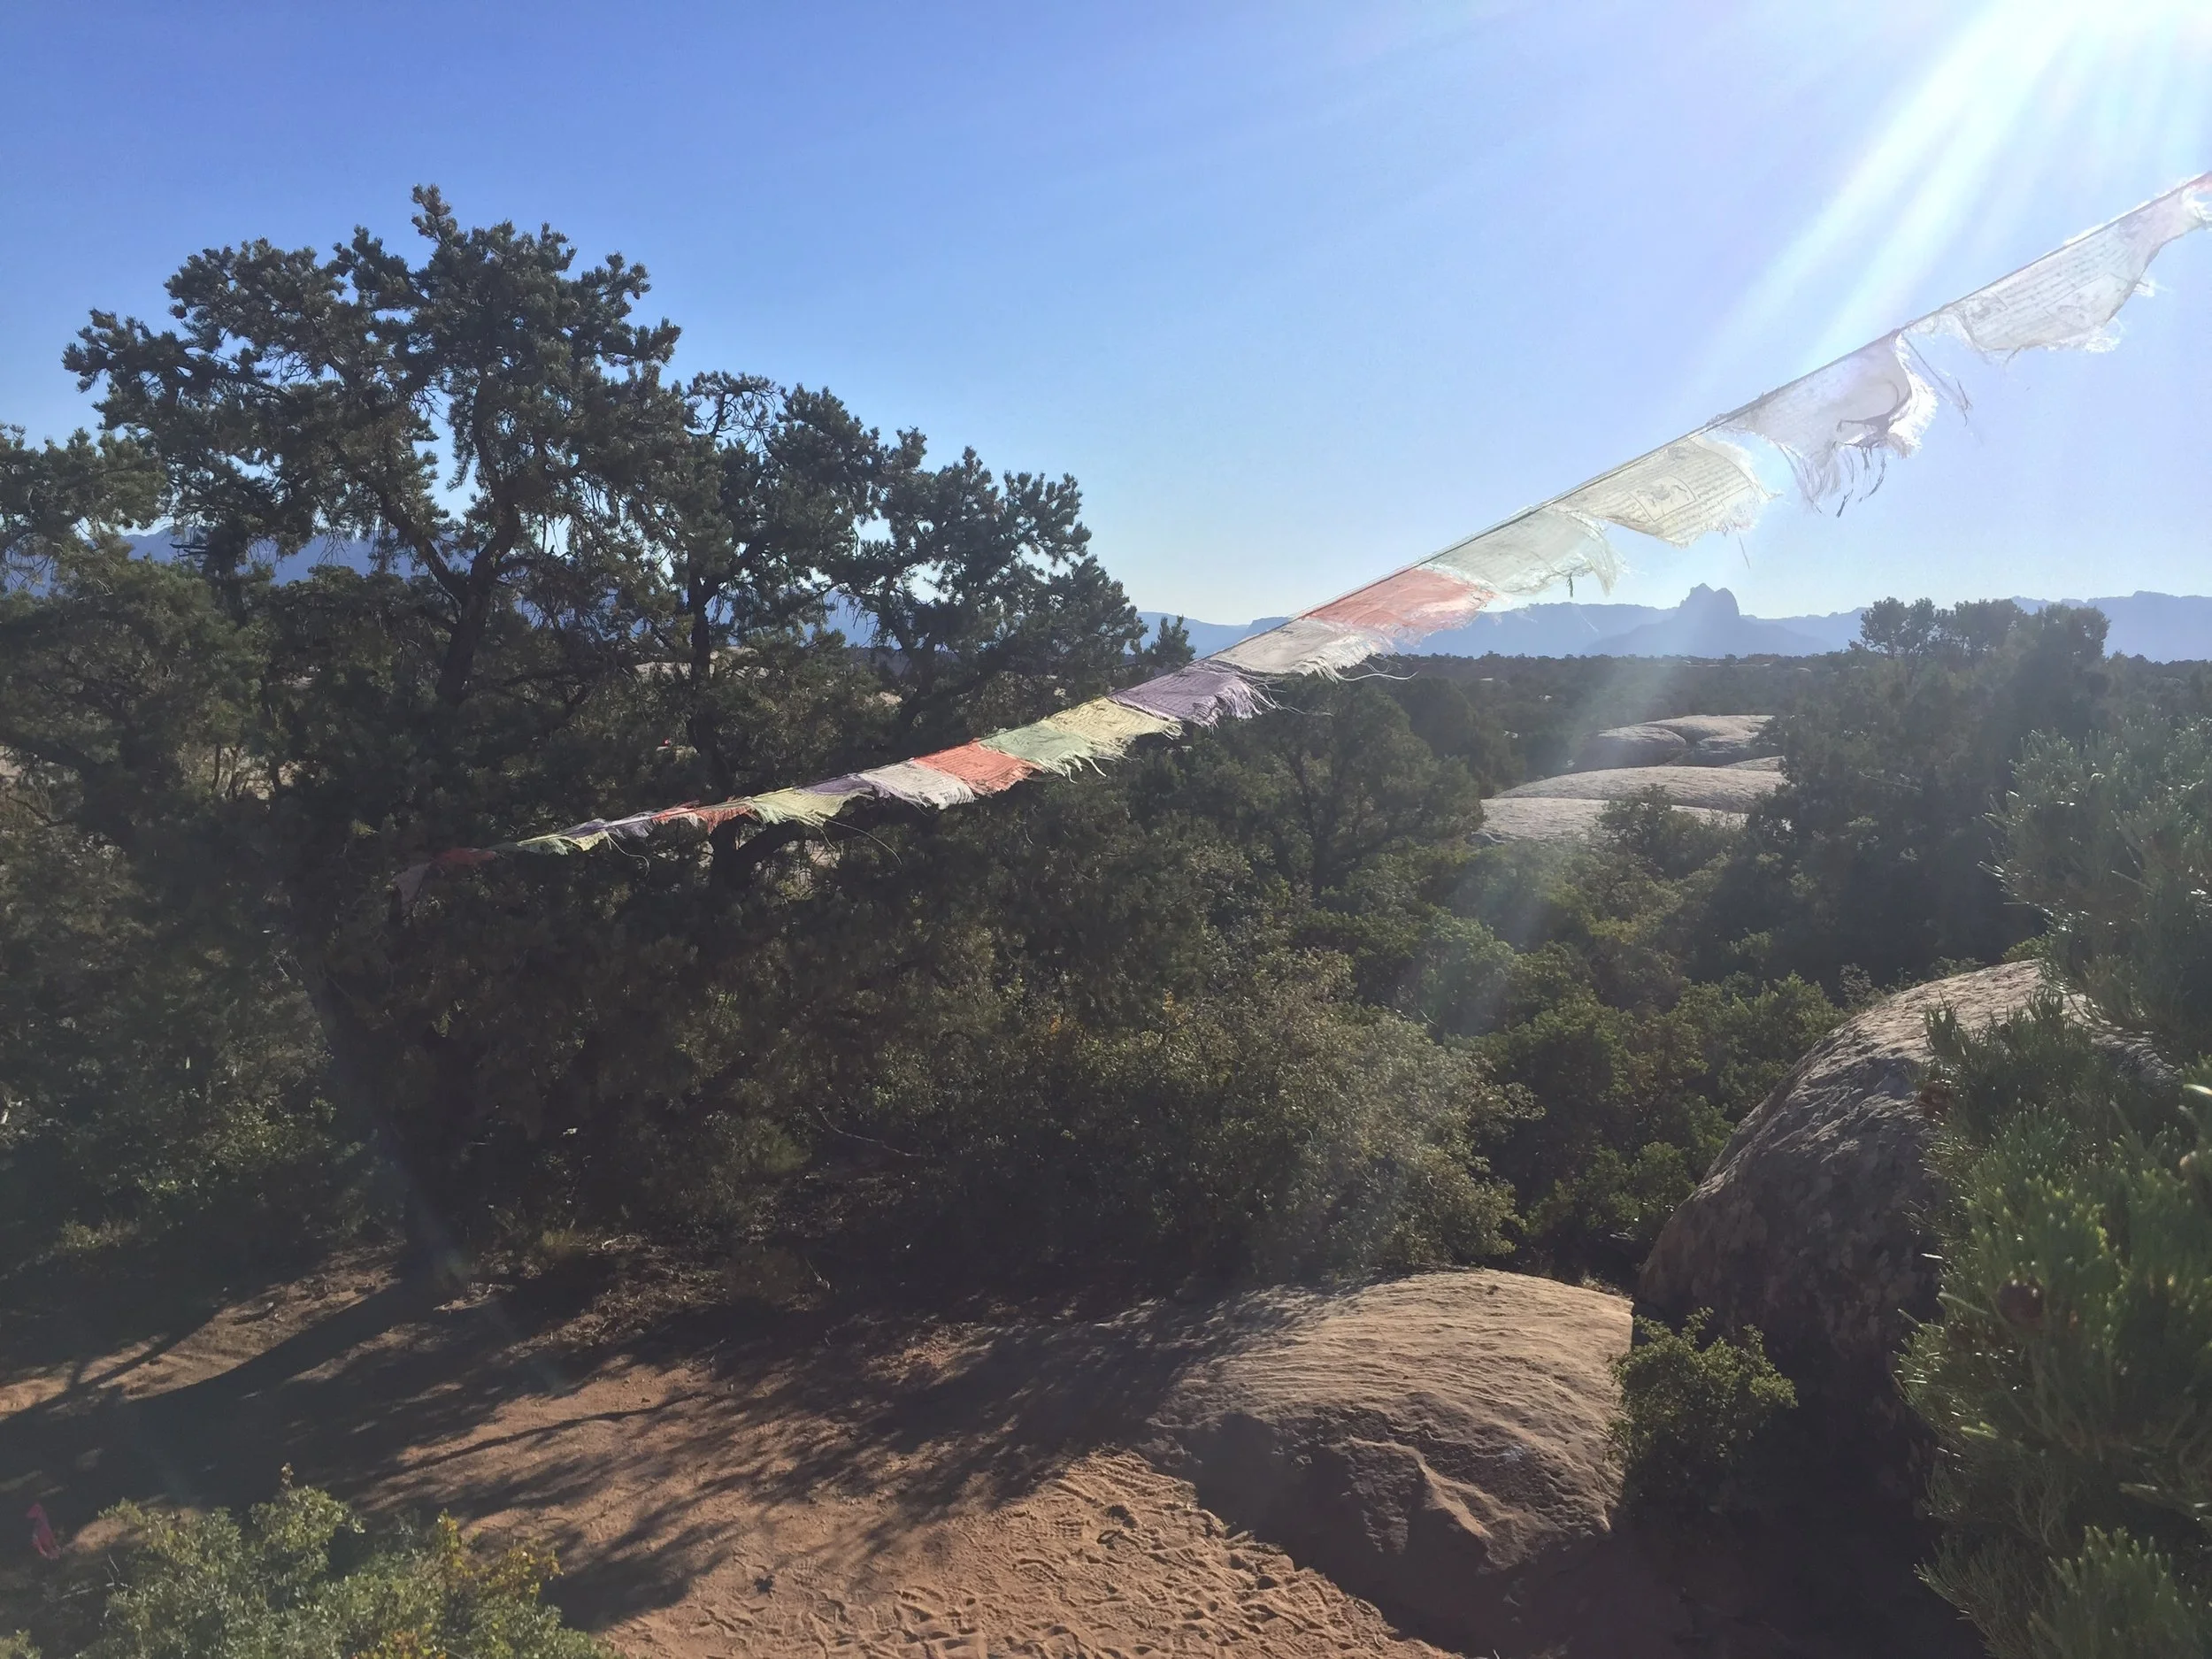
Most Challenging: Grand Circle Trailfest 

I took up trail running towards the end of 2016 as a way to train for longer backpacking trips. I've always hated running, having stuck mostly to roads. I've discovered that running on trails is a completely different experience and one that I actually enjoy. 

As I continued to add additional miles to my long runs I must have been feeling overconfident because my husband convinced me to sign up for the Grand Circle Trailfest, a three day trail running festival near Bryce, Zion, and Grand Canyon National Parks. We only signed up for the first two days, but both days were farther than I had ever run in my life with a lot of elevation gain (Day 1 was 14 miles with 4k elevation gain, day 2 was 12 miles with 2k feet of elevation gain). 

I surprised myself. It was hard, the first day especially, but I did it. It was inspiring and humbling to see people of all ages on the trail. At one point I paced off a lady who looked like she was about 80 and any sense of grandeur I had disappeared immediately. The trails were magnificent and despite my legs being extremely tired, I found myself regretting not signing up for the third day. 

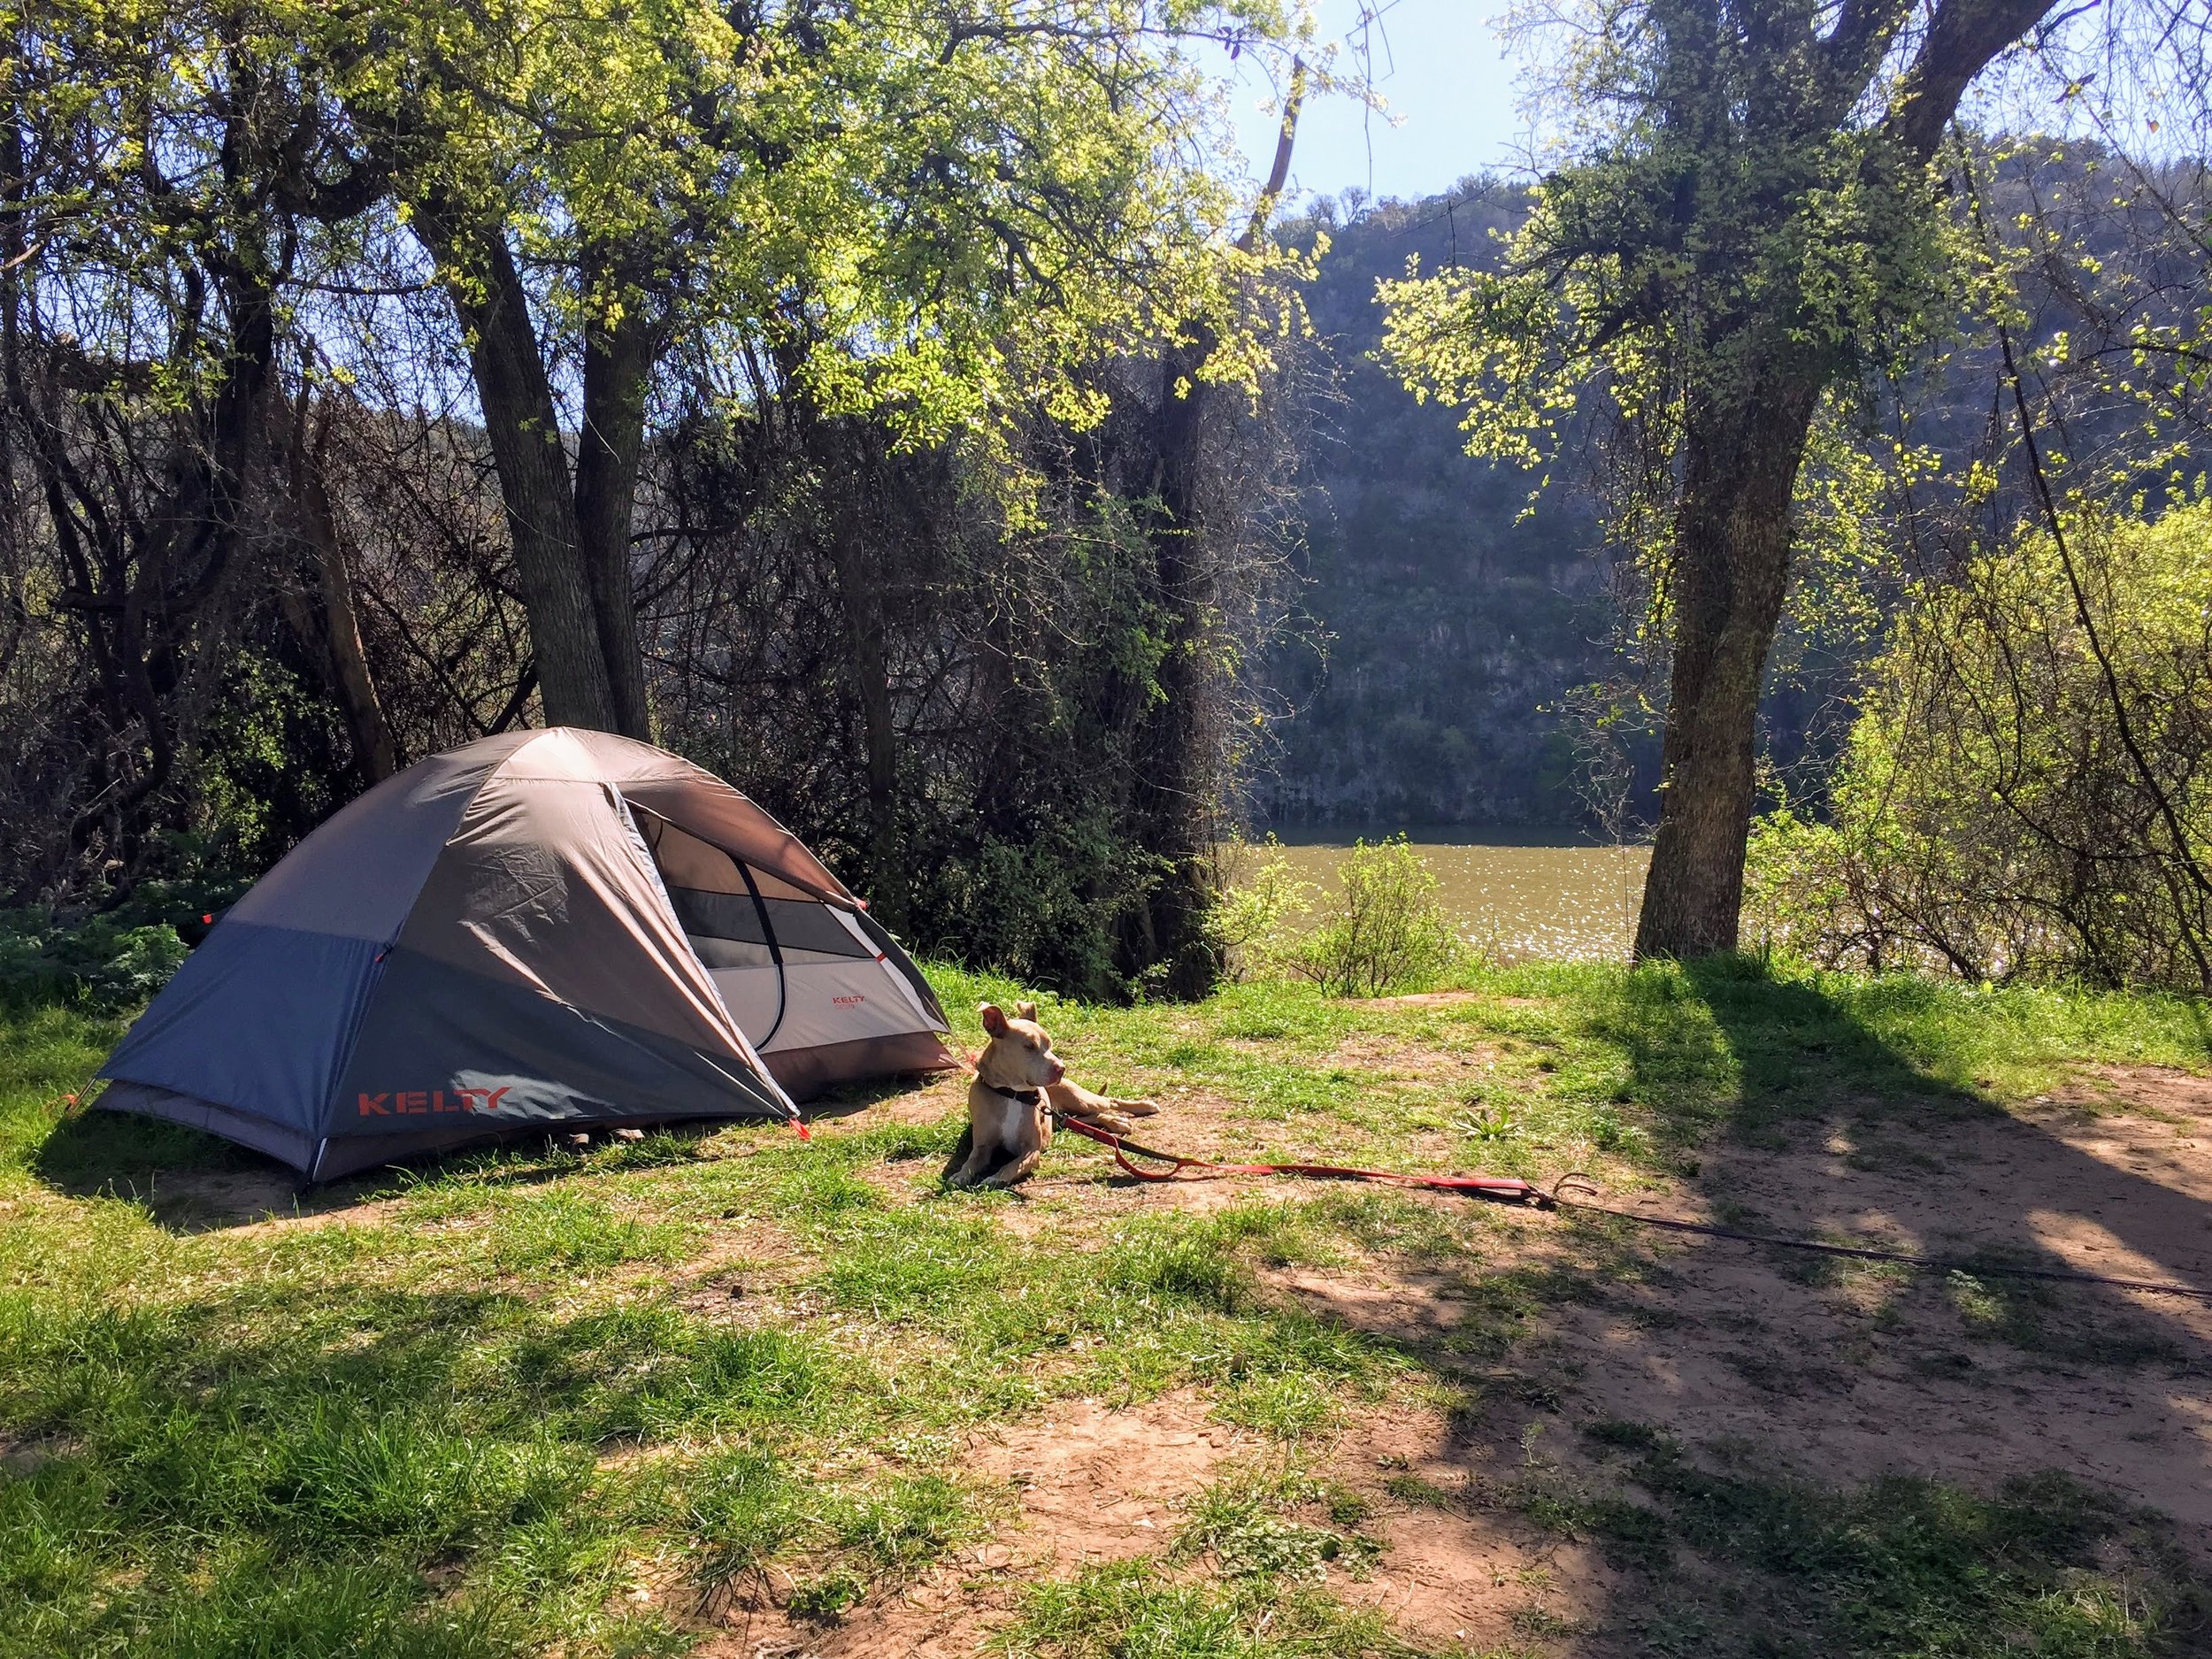
Best Camping: Pedernales Falls State Park 

My husband and I visited several State Parks this year that we had either never been to at all or had never camped at: Pedernales Falls State Park, Garner State Park, Colorado Bend State Park, Virgin Creek State Park, and Enchanted Rock State Natural Area. 

Pedernales Falls 

  1. Pedernales Falls State Park: So far, Pedernales Falls is my favorite camping spot for it's proximity to Austin, private camp sites, and network of hiking trails. 
  2. Colorado Bend State Park: We definitely need a second visit to Colorado Bend State Park as we left a few trails un-hiked on our visit. It's second on my list because the drive-in campsites offer no privacy from other campers (walk-in campsites do), but the hiking trails are beautiful. 
  3. Enchanted Rock State Natural Area: Definitely one of the most unique natural areas in Texas, Enchanted Rock is the closest you'll get to seeing a mountain in South Texas (unless you count Old Baldy in Garner State Park). It's third on my list because the hiking trails are lacking, but if you're into rock climbing I highly suggest checking it out. There are only walk-in campsites so no RVs or roof-top tents allowed. 
  4. Garner State Park: I have to admit this is low on my list because of how crowded the park was. With a two hour wait to check-in on a Friday evening, we likely won't return to this park to camp. 
  5. Village Creek State Park: Unfortunately, this park was heavily damaged by Hurricane Harvey and only the RV camping part of the park is open. All trails are closed and the canoe launch was destroyed during the storm. 

Enchanted Rock 

Colorado Bend 

Virgin Creek

Garner

What's Next? 

My husband Taylor and I are turning 30 this summer and we want to celebrate with our biggest trip yet. We're applying for permits to hike the John Muir Trail in late July. The JMT is a roughly 200 mile part of the Pacific Crest Trail, starting in Yosemite Valley and ending at Mt. Whitney. We expect it to take us around 20 days to complete. Fingers crossed we can get permits! Stay tuned to hear more about planning and logistics for this trip. 


Day Hike to Grinnell Glacier in Glacier National Park

The hike to Grinnell Glacier in Glacier National Park is one of the more enjoyable day hikes we have done. The trail offered a good workout and beautiful views that beg you to stop and stare. The hike starts at the Grinnell Glacier Trailhead in the Many Glacier section of the park and climbs 1,840 feet over 7.6 miles (11.4 roundtrip). It winds through alpine meadows and along a cliff face, offering views of Josephine Lake, Lower Grinnell Glacial Lake, and several waterfalls.

SAM_0411.JPG

Once at the top, you can enjoy a panoramic view of Grinnell Glacier and Upper Grinnell Lake. The color difference between the upper and lower parts of Grinnell Lake is striking. You can content yourself with this view or you can climb down to the edge of the lake and over to the glacier. Walking on the glacier is not recommended but you can walk right up to the edge of it. We spent almost two hours at the top exploring and taking a lunch break. We even saw a few Bighorn sheep while we were walking around. 

Summary

  • 11.4 miles roundtrip.
  • 1,840 feet elevation gain.
  • Don't forget your bear spray!
  • This trail is marked as strenuous although we saw hikers of many different fitness levels (including children) on the trail. I wasn't carrying a pack and my heart rate was definitely elevated but we didn't need to take any breaks on the way to the top. 
  • I highly recommend spending a decent amount of time at the top. Why would you climb all that way if you aren't going to stay a while to enjoy the view? 
  • Most of the hike was warm (we did our hike in August) but it was quite chilly at the top because of the elevation gain and wind coming off the ice. Bring a jacket if you plan on spending time at the top. 
  • If 11.4 miles sounds like too much, you can cut about 3.4 miles off if you take the shuttle boat starting at Many Glacier Hotel. There is a fee to ride the shuttle boat.
  • Get to the trailhead early. This is a really popular day hike and is more accessible to the crowds that we expected it to be. We arrived at the trailhead around 10 am and were lucky enough to get one of the last spots in the trailhead parking lot. Parts of the trail were also pretty crowded and if we had started earlier we might have had a bit more solitude. 

A view of Lake Josephine a mile or so into the hike.

Approaching Lower Grinnell Lake 

A view of lower Grinnell Lake looking back down the trail. Lake Josephine in the background. 

Closer to the top. You can see the glacier in the background.

Upper Grinnell Lake with view of Grinnell Glacier on lefthand side

View of Upper Grinnell Lake with view of Glacier in background

Bighorn Sheep!

Close up photo of Grinnell Glacier 

Upper Grinnell Lake 

Upper Grinnell Lake with view of Grinnell Glacier in background


Gear List for Backpacking in Glacier National Park

My husband and I backpacked for four days and three nights to Brown Pass in the North Fork of Glacier National Park in late August. This is what I carried in my pack. You can read my full write-up of the trip here

Backpacking with a partner is great because you can share gear and spilt up some of the weight. Taylor carried the tent and some of the food while I carried our Jetboil, water purifier, and about 3/4 of the food. If you're backpacking on your own, you might need to make adjustments to this list. 

Photo of my gear for our backpacking trip in Glacier.. A few items were removed/added after this photo. 

GEAR

CLOTHING 

FOOD 

  • ProBars (6 each)
  • Salami (1 each)
  • Tuna packets (6) 
  • Beef jerky (1 large bag)
  • Via coffee packets (6)
  • Dehydrated whole milk 
  • Mountain House dehydrated backpacking meals (3 each) 
  • Gummy Worms (1 bag) 
  • Trail mix (1 large bag)
  • Baby carrots (1 small bag)
  • Nuun Active Hydrating Electrolyte tablets

OTHER

  • Wet Wipes 
  • Advil
  • Tums
  • Hand Sanitizer 
  • Iodine tablets
  • Mosquito repellant 
  • Travel sized sunscreen
  • Travel Sized Deodorant
  • Travel sized toothbrush and toothpaste
  • Hydrocortisone cream 
  • Kleenex
  • Toilet Paper 
  • Moleskin blister dressings
  • Burts Bees lip balm 
  • Small first aid kit 

What We Learned

We've gone on a few backpacking trips and we're still dialing in our gear. We learn something new on every trip and this was no exception. 

Rain Gear
I agonize on every trip I go on whether or not to bring my full compliment of rain gear. This includes my rain jacket, waterproof pants, and pack cover. I decided not to bring my waterproof pants this time because the forecast didn't call for rain. Well, the forecast was wrong. We got pretty drenched on the second day of our trip. I think I've finally learned that unless I am going somewhere where it almost never rains (like the Grand Canyon), I'm bringing all of my rain gear. It's worth the little bit of extra weight to stay dry and comfortable. 

Utilizing the outside of my pack
I realized on this trip that I do not use the outside of my pack enough and always try to squeeze everything inside of it. For example, I left my very lightweight but comfortable camp chair at home because it wouldn't fit in my pack. Weighing in at only a pound, I could have easily have strapped this to the outside of my pack and had a comfortable place to sit during our hours at camp. 

Bringing the right amount of food and water
This is probably the hardest thing for me. I definitely pack my fears when it comes to packing food and water. On this trip, I could easily have brought a water bottle with attached purifier and filled it up along the hike instead of carrying 3 liters on my back each day. We're also still figuring out the formula for the right amount of food. We had quite a bit of food leftover and didn't even touch the tuna packets we brought. 


Backpacking in Glacier National Park

OUR TRIP AT A GLANCE 

How we got there: AUS > DEN > FCA
Dates: August 23rd - 26th
Hike Stats: 31.4 Miles over 4 days, 2,870 ft elevation change
Itinerary: Bowman Lake Trailhead > Bowman Lake Head Campground > Hole in the Wall Campground > Bowman Lake Head Campground > Exit via Bowman Lake Trail
Day 1: 7.1 miles, 0 elevation gain, 3.5 hours
Day 2: 8.6 miles, Elevation: Up 2,610 | Down 260, 6.5 hours
Day 3: 8.6 miles, Elevation: Up 260 | Down 2,610, 5 hours
Day 4: 7.1 miles, 0 elevation gain, 3 hours
Favorite part: Brown Pass
 

Choosing your Route

Glacier National Park is gigantic. With over 700 miles of trails, you could plan several different backpacking trips and cover only a fraction of what the park has to offer. We spent an entire week in the park and I'm already planning our next visit. 

The park is divided in two by the Continental Divide. The West side of the park is generally lower in elevation and more heavily forested. It's also less visited than the East side of the park which is higher in elevation. We chose to hike in the North Fork section of the park because it's the least visited and most remote part of the park. We also saw Brown Pass listed on National Geographic's top 10 backpacking trips in US parks and just couldn't resist.

You can read about the other parts of the park and what they have to offer on the Park's website. Click here for a detailed map of each trail and backcountry campsite in the park. 

Things to keep in mind when choosing your route: 

  • Transportation: How will you get to and from your trailhead? Most of the park has free shuttles; however, the North Fork is only reached by private vehicle and has mostly unpaved roads. Many people hitch hike back to their car once they finish their hike. We chose a route that began and ended at the same place. 
  • Mileage limit for advanced reservations: The park places a 16 mile a day limit on advanced reservations. This may impact the number of days it takes to do a specific route. 
  • Availability: The route you actually take will largely be based on permit availability. Most of the campsites have very few spots and half of those are reserved for walk-in reservations. The most we saw in one campsite was six, the least was three. See below for more information about attaining a backcountry permit. 
  • Timing: July and August are the best times to plan a backpacking trip in Glacier. Many backcountry sites don't even open until August because of the tremendous amounts of snow the area gets in the winter. Hiking is still possible in September and October but you'll need to be prepared for potential snow storms and very cold weather. 

We picked up our permits at the Apgar Backcountry office next to Lake McDonald.

Permits

Permits are required for any backcountry camping in Glacier. You have two options when obtaining a permit: 1) Advanced Reservations or 2) Walk-In Applications. 

Advanced Reservations

Advanced Reservations open on March 15th at 8am MDT (March 1st if your group is larger than 8 people) and are processed in the order received. If you have your heart set on a specific route or if you are traveling to Glacier from far away like we did, I suggest trying for the advanced reservation. With a $40 application fee, it's more expensive than a walk-in reservation, but you don't have to worry about trying to attain a permit once you get there. The worst part is the wait; it can take up to 4 weeks to hear back (it took us 31 days to get our application approved). There is also a limit of 16 miles a day for advanced reservations, and this may impact the campsites you can stay at. 

Keep in mind that you have to pick up your permit in person at one of the Backcountry offices in the park 24 hours in advance of the start of your trip. 

Learn how to submit your application here

Walk-In Applications

About half the sites in each campground are reserved for walk-in applicants. These permits can be obtained by visiting any of the backcountry offices in the park up to 24 hours in advance. Unlike the advanced reservations, there is no $40 application fee and you only pay $7 per person per night.

If you are flexible on the route you take, are hoping to plan a last minute backpacking trip, or want to hike more than 16 miles in one day, a walk-in application might be the right option for you. 

Our Hike

We chose to do an out and back trip so we didn't have to worry about hitch hiking when we were done. In hindsight, I wish we had taken the chance and done a thru-hike instead. While we enjoyed the hike immensely, it would have been nice to see more of the North Fork rather than seeing the same section twice. 

Day 1: Bowman Lake Trailhead to Bowman Lake Head Campground

Bowman Lake Trailhead 

Our day started out by driving down miles of dirt roads through Polebridge and into the North Fork area of the park. We stopped at the Polebridge Mercantile, a bakery/general store which is over 100 years old, and grabbed a coffee and some baked goods before starting the hike. After passing the ranger station, the trailhead is another six miles down an unpaved road that is barely big enough for two-way traffic.

Polebridge Mercantile 

Bear Claw that's actually shaped like a bear claw

Starting at the southern most tip of Bowman Lake, the first day of our hike was 7.1 miles of mostly flat trail along the side of the lake. Armed with our bear spray, we clapped our hands and yelled "HEY BEAR" probably more than was necessary. We never did see a bear. 

Beginning of our hike. The trailhead begins off camera to the left and follows along the lefthand shoreline. 

Day 1, Mile 1. Bowman Lake Trailhead to Bowman Lake Head Campground. 

You quickly lose site of the water due to the denseness of the trees and other foliage. About halfway through the day's hike, you begin to get closer to the lake and follow it's edge until you hit Bowman Lake Head Campground.

The campground is right along the lake and is a popular place for kayakers to stay. We were the only party staying the night that hiked to the campsite. Everyone else had kayaked or canoed from the start of the lake. The campground includes a pit toilet, cooking/food area, horse hitching area, and six campsites. 

View of the lake from Bowman Lake Head Campground 

Taylor relaxing at the edge of our campsite while enjoying a view of Lake Bowman

Day 2: Bowman Lake Head Campground to Hole in the Wall Campground

We awoke on the second around 7:30 am to the beginning of a rain shower. After frantically packing up and magically keeping our tent (mostly) dry in the process, we grabbed a quick breakfast and headed out. 

The first half of the day was much like the day before, flat and very forested. At about mile 4 we had a brief break in the trees and the rain finally stopped. We then started the climb up towards Brown Pass, gaining a total of 2,610 feet of elevation. Our entire mileage this day was 8.6 miles and it took us about 6.5 hours. 

Most of the climb is over once you hit Brown Pass Campground and then it's only another 2 or so miles until you get to Hole in the Wall. Brown Pass was by far the most beautiful part of the hike and we definitely dawdled to take in the views and eat all the huckleberries along the trail. 

Hole in the Wall Campground is possibly the most beautiful place I have ever stayed the night. It was well worth the climb and I wish we had been able to stay for more than one night. The campground includes a pit toilet, cooking/food area, and five campsites.

Day 3: Hole in the Wall Campground to Bowman Lake Head Campground

On day 3 we re-traced our steps and enjoyed the sunshine we didn't have the day before. It took us about two hours to go two miles from Hole in the Wall to Brown Pass Campground because we kept stopping to take in the view, snap photos, and eat huckleberries. We begrudgingly made our way out of the pass and back into the heavily forested area on our way to Bowman Lake Head Campground. 

View of Bowman Lake from Brown Pass

Brown Pass

Day 4: Bowman Lake Head Campground to Bowman Lake Trailhead

We purposefully got a late start so we could enjoy the campground as much as possible before heading out. The water of the lake was so calm and the water of the lake was even more clear than before. The hike out was quick and easy but we enjoyed the beautiful weather and views of the lake. We stopped at the Polebridge Mercantile again for some iced coffee before heading over to the East side of the park for the rest of our stay and some amazing day hikes. 

Very calm Bowman Lake in the morning


Miscellaneous Tips & Tricks 

  • [COMING SOON] Click here for my full gear-list for this trip as well as a list of items I wish we had brought or left at home. 
  • Rent your bear spray! Bear spray is pretty much a must if you're hiking in the backcountry of Glacier, but it's not cheap. One bottle will run you $45-50 and you can't carry on or check it in your luggage. Glacier Outfitters in Apgar Village will rent you a can of bear spray and help you save a few bucks. They charge $9.25 for a day, $18.50 for 48 hours, $28 for 3-7 days, and $32 for 8-14 days. We saved about $30 bucks this way. 
  • You must filter your own water while camping in the backcountry, but there is plenty of it. We could have carried much less water than we did since we were almost always near a source from which we could filter (always check with the rangers to double check there are water sources on your hikes). 
  • The early-bird gets the worm, or whatever. We had a few days after our backpacking trip to do some day hikes and found that the trails on the East side of the park got pretty busy in the late morning. Next time we'll be more on our game and get up early so we can experience a bit more solitude. 


Grand Canyon Rim to Rim Packing List

We hiked the Grand Canyon Rim to Rim at the beginning of June 2017. This is what I carried on my back! Read my full write- up of the trip here

Full disclosure, having a hiking buddy to share the load helps a lot. I carried most of our food because my husband Taylor carried the tent. If you're doing the trip by yourself, you might need to adjust what you bring with you. 

We didn't officially weigh our packs, though I would guess once we added water we were between 35 and 40 pounds. 

Gear

Clothing 

Food 

  • ProBars
  • Clif Bars 
  • Muesli 
  • Summer Sausage
  • Tuna packets (flavored and regular) 
  • Beef Jerky 
  • Loaf of bread 
  • Jar of Peanut Butter
  • Small bottle of Honey 
  • Via coffee packets
  • Clif bar goos with caffeine 
  • Haribo Gummy Bears
  • Fruit twist snacks
  • Canned sardines in olive oil
  • Canned oysters in olive oil 
  • Nuun Active Hydrating Electrolyte tablets

Other

  • Wet Wipes 
  • Hand Sanitizer 
  • Iodine tablets
  • Mosquito repellant 
  • Travel sized sunscreen
  • Travel sized toothbrush and toothpaste


What I wish we had left behind:

Rain Gear
It rains very little in the Grand Canyon but I am always a bit paranoid when it comes to having rain gear. I brought it, but it was very unnecessary on this trip and we could have easily left it behind. 

Tent and footprint
It was hot enough and there were few enough bugs that we could easily have slept without a tent and saved ourselves some weight and room. 
 

What I'm super Happy we packed:

Opsak odor proof bags
You must pack out everything you pack in, so these bags are a life saver for any trash that might smell. We had a lot of seafood with us (tuna, oysters, sardines) and you wouldn't believe the smell after walking through the canyon heat with the trash. Thankfully, we didn't smell a thing until we opened the Opsak bag to empty it. 

Camp Shoes
Our friends didn't bring camp shoes in an effort to lighten their load. They regretted it and we secretly rejoiced that we brought ours. We had a lot of down time and got in and out of the water a lot, and it was really nice to have sandals we could get wet. 

Mission Multi-Cool
The rest of the group made fun of me for how excited I was about this piece of fabric. It can be worn several different ways but I mostly wore it around my neck. It really helped keep me cool and stayed cold for long stretches of time. 

Extra Clothes
I wore my long-sleeved shirt and pants during the day and brought running shorts and a t-shirt to hang out in at camp and sleep in. I also brought an extra pair of running shorts and shirt so I could have a set of clean clothes when we finished the hike. It was nice to be able to shower and change into clean clothes when we got to the South Rim. 


Discovering Nature

Where were you when you discovered your love for nature?

This discovery came slowly for me. I grew up in the suburbs of San Antonio, the seventh most populated city in the US. While I spent a lot of time outside growing up, my activities centered mostly around team sports. A few RV camping trips with my grandparents and extended family were fun but made no lasting impression. 

I was 24 when my boyfriend (now husband) Taylor suggested we tack a visit to Colorado onto the end of another trip we were taking to Washington DC. I agreed, and before I knew it we were driving through Estes Park on our way to Rocky Mountain National Park. At this point, I was more excited to see the famous Stanley Hotel (which had served as inspiration for Stephen King's novel The Shining) than I was for our hike. 

TrailheadSign.jpg

Taylor had done some research and picked a 9-mile hike for us to do named Sky Pond. The hike begins at Glacier Gorge Trailhead, one of the more popular parts of the park. Because of this, we started the hike surrounded by other park visitors, many of which dropped off about a mile in at Alberta Falls. The chatter of other people died away as we continued on and the trail became continually more challenging. Not used to the elevation, I trailed several steps behind Taylor for most of the hike. 

Loch Vale aka The Loch, about 3 miles into the Sky Pond hike

Loch Vale aka The Loch, about 3 miles into the Sky Pond hike

About four miles from the trailhead we reached the base of Timberline Falls. From there, the trail went directly up the side of the waterfall. This required us to climb/scramble about 100 feet up. The climb wasn't too difficult, but I found it exhilarating. Once at the top, we found the Lake of Glass and amazing views of several surrounding peaks. Despite the many people we had started the hike with, we were the only ones who had climbed the falls and we had this beautiful piece of nature all to ourselves. 

Lake of Glass, Rocky Mountain National Park 

Lake of Glass, Rocky Mountain National Park 

That moment at Lake of Glass stands out vividly in my memory. The feeling of accomplishment of having made it to the top, the slight fatigue from the hike, the solitude, and the natural beauty of the Rocky Mountains formed an intoxicating combination. This was the moment I fell in love with the outdoors. 

Where were you? 

Heading down from Lake of Glass

Heading down from Lake of Glass

Lessons Learned in Lost Maples

Screeeeeeee!

I sit bolt upright in the tent.

What was that?

“Sounds like a hog,” Taylor says. The unnatural squealing echoes again in the distance followed by deeper, guttural grunts.

“Oh. Ok.” Just pigs. No big deal. They sound far away anyways. Totally harmless.

It was New Year’s Eve 2015 and we were visiting Lost Maples State Natural Area for the first time. This was our first solo camping trip as a couple - my first hike-in camping experience - and both of us were excited to celebrate the new year under the stars. Unfortunately, the cold weather and lack of fire (no fires allowed in hike-in campsites at Lost Maples) had led to us crawling into our tent as soon as darkness fell.

I lie back down, grab my kindle, and try to rig it so I can read with as little of my body exposed as possible. It’s 20-ish degrees, I’m freezing, and just generally not having a fantastic time. My feet, wrapped in two pairs of thick wool socks, still feel frozen.

It’s the first of what is supposed to be three nights camping, and I’m seriously lacking the commitment that I’ll need to make it through the next two nights. I’m going over all the reasons why we should leave tomorrow and weighing which ones would convince Taylor to end our trip early. I land on the fact that the dog – our Catahoula Pitbull mix named Coca – looks like she’s having an even less fun time than I am. She’s shivering despite being wedged between us with several blankets. Clearly, she’s missing her warm couch and wondering why we’ve decided to punish her this way.

I’m finally starting to feel sleepy and thinking if I try really hard maybe I can fall asleep despite the cold. I close my eyes. Several moments later I hear a twig snap outside. I can feel Coca and Taylor move next to me.

Snort Snort Snort, Craaaaaack, Rustle Rustle, Snort Snort!

These new noises are mere feet from the tent. Screeeeeeee! goes the hog in the distance.

Something nudges the tent by our feet. We both sit bolt upright. Another twig cracks from the opposite side of the tent, followed by several more snorts and grunts. Our tent is surrounded by wild hogs.

One of us turns our headlamp on, hoping it won’t spur the hogs into a wild tent-attacking frenzy. We urgently begin whispering, hatching a plan.

How do you handle hogs? Can you scare them away? Or will they attack?
No idea.
Shit. Why are they so close to the tent?
Umm. We have food in the tent.
Oh yeah. Oops.
Shit.
Yeah.

We had naively thought that there was nothing in the area that would be drawn to our meager food rations, most of which was pre-packaged and in Ziploc bags. Maybe a possum or a raccoon, but nothing that would cause us a real issue. Not several huge hogs with razor sharp tusks (ok maybe my imagination was running away from me). We now found ourselves eye level with who knows how many wild hogs, with only a thin layer of nylon tent between us and them.

After what feels like an eternity sitting in silence waiting, we realize our late-night guests are not in a rush to leave. Our ferocious hog hunting dog is literally shaking from cold and/or fear between the two of us. She hasn’t made a move. We’re thankful for this, since we’re not sure if hogs would be scared or react defensively to a dog’s bark from inside a tent. After what seems like an eternity, we take a chance and decide to try to scare them away by making a bunch of noise. I wait for a razor-sharp tusk to tear its way through our tent wall, but thankfully that doesn’t happen. We hear them walk away and after a few minutes, the coast seems to be clear. Taylor carefully gets out of the tent and ties our food up in a nearby tree.

We had a fitful night’s sleep. I kept waking up because my feet were so cold. The dog was shivering. In the morning, we packed up camp. We enjoyed the park for the rest of the day and then headed home to sleep in our warm bed.

This wasn’t what I would call my favorite camping trip, but I learned several valuable lessons. Some of these may seem like common sense, but if you’re new to camping you may not even think about these.

Lost Maples gets its name from the many maple trees, making Autumn an amazing time to visit. Check out their Instagram for some really beautiful photos of the fall foliage. 

Lost Maples gets its name from the many maple trees, making Autumn an amazing time to visit. Check out their Instagram for some really beautiful photos of the fall foliage. 

Lesson 1: Proper Food Storage and Handling

For people who camp or hike on a regular basis, not keeping food in your tent is a no brainer. As a newbie to camping, I didn’t even think about it. Our close encounter with the hogs ensured that I’ll never do that again, especially when hike-in or backcountry camping where there are likely to be animals outside of possums and raccoons.

Using proper food storage and/or hanging your food from a tree overnight or anytime you leave it unaccompanied is key. This also extends to other smelly items you might be carrying, like toothpaste or sunscreen. You’ll also want to dump any water used for cooking or washing dishes at least 200 feet away from your campsite.

If you’re car camping in a place without bears, a cooler works as a great storage container, but raccoons and possums can still easily open them. Put something heavy on the lid or keep it in the car overnight.

If you’re hike-in or backcountry camping, you can use a bear bag or canister or an odor-proof bag like OPSAK bags. Use a rope to hang your food from a tree. You can tie a rock or other heavy item to the end of the rope to help you throw it over a high limb. Once over, attach your food bag and hoist it into the air. You want it high enough and far enough away from the tree trunk that animals can’t reach it (think about a bear on its hind legs!). Tie the rest of the rope around the tree trunk to secure it.

Always check online to see if the place you’re visiting has special rules around food storage.  

The pigs outside of our tent probably looked a lot like this one. Not as scary as I imagined!

The pigs outside of our tent probably looked a lot like this one. Not as scary as I imagined!

Lesson 2: Know the local wildlife and how to handle an encounter

Aside from knowing how to protect your food from the local wildlife, you should also be knowledgeable on how best to handle a direct encounter. Upon arrival at the park, Taylor asked the ranger if there were any wildlife we should be aware of. There was no mention of hogs. Despite this, we should have been prepared and known how to react. 

We were lucky that our animal encounter was not actually super dangerous. I looked it up after the trip, and feral hogs of this kind prefer to avoid humans and generally don't attack unless cornered or protecting their young. All the same, if you come across them, it's best to keep your distance.

Lesson 3: Weather ratings for gear are a thing, and they matter

Ok, so 20 degrees Fahrenheit isn’t that cold, but it’s rare for it to get that cold in this area of Texas. Not only do I hate the cold, but I also didn’t have the right equipment to be comfortable in that temperature. Turns out, my bag was a summer season bag and was only rated for 35 degrees and higher. This is normally a perfect bag for camping in Texas, but the cold took us by surprise.

I also learned the value of checking average lows and highs before I plan a trip, as well as checking forecasts a week out so I can be sure to pack the right gear. 

Lesson 4: Don't Expect Perfection

Had I let this experience color my entire outlook on camping, I would not have been eager to plan my next trip. I took this for what it was - poor planning - and learned from the experience. Part of the fun is learning along the way. If you head out on your first camping trip and have a less than ideal time, try again. Take what you learned and put that knowledge towards making your next trip better. 

Summary:

  1. Learn proper food handling and storage to avoid having animals enter your camp and attempt to get into your food stores.
  2. Research the local wildlife and how best to safely manage a direct encounter.
  3. Check the weather before you go and make sure your gear is rated for the conditions you might encounter.
  4. Not every trip will go perfectly, and that's ok. Take what you learn and apply it to your next trip. 
OscarWilde.jpg

Hiking the Milford Track


We had the opportunity to hike the Milford Track at the end of our honeymoon to New Zealand in November. It was without a doubt the highlight of our trip (Yes, it even surpassed our visit to The Shire.). Aside from the long distance you'll have to travel to get there, the hike is actually very accessible and easy to do if you have all the information you need to plan it. Hopefully this post will help with that part! 

The Milford Track is a 53.5km (33.2 mile) hike through Fiordland National Park on the southern tip of New Zealand. For 4 days and 3 nights, you tramp through some of the most breathtaking scenery in the country, which is saying something because damn, New Zealand is a ridiculously beautiful place. The track, heralded as the most popular of New Zealand's nine Great Walks, takes you through rainforest, over a mountain pass, and past countless waterfalls and bubbling streams. 

The start of the Track!

When to Go

The Great Walks season is from end of October to beginning of May each year. The official season for 2017 is October 25th through May 4th. For those of us on the opposite side of the world, remember that Winter and Spring for us is Summer and Fall for New Zealand.

You can also hike the Milford Track in the off season, but the hut facilities are greatly reduced and there are additional safety concerns (like avalanches) to consider. The Department of Conservation suggests that only experienced and well equipped people attempt the track in the off season.

This is a popular hike so book early to avoid disappointment. For our trip at the beginning of November, we made our reservations in mid-May. At the time of our reservations, there were only a couple spots left in each hut. The Department of Conservation (DOC) hasn't released the dates that reservations will open yet, but they'll be posted here.

Day 2 of the hike, surrounded by waterfalls on both sides. 

Why walk the track independently versus taking a guided trip?

You can walk the track independently or pay large amounts of money to take part in a guided tour. The guided tours will run you between $2,000 and $3,200 (NZD). They're easier and more comfortable since your food is provided (lighter packs!) and you stay in private huts. But where's the fun in that?

Walking the track independently will cost under $500 a person. This includes the cost of transportation to and from Queenstown and food for four days. You'll want to add another $200 or so if you need car relocation services.

Whether you pay for the guided tour or not, everyone gets to hike the same trail and see the same amazing scenery. For me, the main appeal of a guided tour is the convenience of not having to plan anything; however, hiking independently only takes a little extra effort and saves mucho moolah.

Logistics

Getting to and from the trailhead is by far the hardest part of the hike. The DOC actually has a fantastic website with all of the information you need, but I still managed to get confused while I was booking this trip. I've attempted to simplify all the relevant information for you in the Itinerary and Reservation sections below.

Itinerary

Below is what your itinerary will look like. You can only hike the Track in one direction. If you're not coming from Queenstown like we were, then simply substitute your previous location where it says Queenstown. 

Day 1:
Queenstown > Te Anau Downs
Te Anau Downs Water Taxi > Trailhead
Trailhead > Clinton Hut (5km, 3 miles)

Day 2:
Clinton Hut > Mintaro Hut (16.5km, 10 miles)

Day 3:
Mintaro Hut > Dumpling Hut (14 km, 8.6 miles)

Day 4:
Dumpling Hut > Sandfly Point (18km, 11 miles)
Ferry from Sandfly Point > Milford Sound Village
Milford Sound Village > Queenstown or wherever you're going next!

Reservations

Here is a list of all of the reservations you'll need to complete the trip, in the order you should complete them:

  1. Hut reservations. You must make a reservation through the DOC website for all 3 huts. 
  2. Ferry from Te Anau Downs to the start of the trailhead (about an hour ferry ride). Note: Both ferry rides (see #3) can be booked at the same time that you book the huts. To simplify things and to ensure you get the ferry times you want, I highly suggest booking at the same time. If for some reason you don't want to take the DOC run ferry, you can book this leg of the trip through Fiordland Water Taxi.
  3. Ferry from Sandfly Point (end of trail) to Milford Sound Village (a 5 minute ferry ride). As far as I know, this can only be booked through the DOC. Again, I suggest booking this at the same time you book the huts. 
  4. Bus to Te Anau Downs. The Tracknet bus is great and syncs it's arrival times with the ferry departure times. The bus from Queenstown to Te Anau Downs also makes a stopover at the Te Anau DOC Visitor Centre so passengers can collect hut and boat tickets.
  5. Bus from Milford Sound Village to wherever you're going after the hike. 

What if I'm driving instead of taking the bus?

We found the Tracknet bus system to be extremely easy and didn't want to pay for a rental car that we weren't going to use for four days, but if you are renting a car, you have a few different options. You can pay for a car relocation service such as Easy Hike. They will relocate your car from Te Anau Downs to Milford sound so you can pick it up at the end of the hike. This will run you about $225. You can also park your car at Te Anau Downs and then book the bus from Milford Sound to Te Anau. Our bus stopped at Te Anau Downs on the way to Te Anau for those who left their cars. This stopover isn't listed on Tracknet's website, so I suggest calling to confirm if you want to use this option.

View from trail on Day 2

What about the huts?

There is no camping allowed on the track. Honestly, camping probably wouldn't be very enjoyable because of the exorbitant amount of rain the area gets. Instead of tents, you stay in three different huts along the trail.

The huts are surprisingly comfortable. During the Great Walks season each hut includes bunks with mattresses, clean water supply, flushing toilets and sinks (no showers), and gas stoves for cooking. The sleeping area is communal, so pray you don't get a snorer next to you like we did on the first night. There is also a resident DOC ranger at each hut to give you weather updates and answer any questions. 

View from Clinton Hut during a brief break in the rain. 

View of the moon from the front porch of Mintaro Hut.

What to bring

The DOC website has a great equipment list for the hike. I'll stress a few things that I think were extra important to have on hand.

Waterproof matches or lighter: The gas stoves do not have starters on them so you must bring your own fire. Unfortunately, this was the one thing we forgot. We had to spend the entire trip begging matches off other hikers.

Sandals/Camp shoes: You're not allowed to wear your boots in the huts and you definitely want to air out your smelly feet after hiking all day.

Ear Plugs and/or Ear Buds: While the DOC ranger encouraged any snorers to sleep in the kitchen area, we still ended up with a horrible snorer in our bunk room the first night. I have seriously never heard anyone snore this loud in my life. Even my audiobook wouldn't drown him out.

Trekking Pole(s): This made coming down the pass on the third day way easier than it would have been without. It was also helpful in our attempts to maneuver around huge puddles.

Waterproof EVERYTHING: It rains here. A lot. A lot a lot. Definitely make sure your boots are waterproof. I also recommend a good rain jacket, waterproof pants, and a rain cover for your pack.

Sandfly Repellant: These tiny bugs come straight from hell and will not only annoy the crap out of you by flying around your face but will bite you too. The bites often don't show up and get itchy for a few days either, so they're extra sneaky. Definitely bring sand fly repellant and apply multiple times a day. You'll be especially glad when you get to Sandfly Point at the end of the hike. 

Something to do in the evenings: We finished our hike before 3pm each day. If you have good weather, you can spend the afternoons exploring the areas around the hut. If not, you're stuck in the hut. Bring a book (we both brought our Kindles), cards, or something else to occupy your time just in case.

Mackay Falls on the 4th day of the hike. 

Here we are at Sandfly Point. You can't tell because they're so tiny but there are swarms of sandflies all around us.

Other tips

Don't miss Sutherland Falls: On the third day, it might be tempting to skip the side track that leads to Sutherland Falls and head straight for Dumpling Hut. Don't do that. Sutherland Falls is the highest waterfall in New Zealand at 580 meters, and is simply amazing. It's well worth the roughly 45 minute detour, even if you're tired. You'll be glad you did it.

View of Sutherland falls. It's really hard to tell the scale from the photos but it is massive! 

View from our Riverview Chalet at Milford Sound Lodge

After the Hike: If you'd like to treat yourself after the hike, we recommend staying in one of the Chalets at the Milford Sound Lodge. We stayed two nights in a Riverside Chalet and enjoyed it immensely. The view of Cleddau River from the King sized bed in our private suite might have been the best part of our whole honeymoon outside of the hike. It was especially rewarding after spending the previous three nights in the huts. It's the only accommodation in the area so you should book at the same time you book your hike.

Make your pack lighter: If you're visiting New Zealand for an extended period of time like we were and aren't renting a car, you might be looking to temporarily off-load some of the extra stuff you have in your pack before you hike for 4 days (e.g. jeans, nicer shoes, etc.). We ended up leaving stuff with our hotel in Queenstown and coming back for it later, but we also noticed the Queenstown Airport had lockers we could have used that were not very expensive.

Helpful Resources:

On Mackinnon Pass, elevation 1,154 meters

Colorado Bend State Park

Nothing beats the feeling of packing up the car and heading out for a weekend of camping on a beautiful Spring day. Windows down, dog panting in the the backseat, we played hooky from work on Friday to head out to nearby Colorado Bend State Park for the first time. As we pulled up to the park entrance around 2pm, a line of cars and two park rangers greeted us. The park was full and closed for day-use until at least 4pm. Looking around at the cars pulled over on the side of the road who were waiting to get into the park, we could see a lot of surly faces. Thankfully, our camping reservations had secured us entrance. We breathed a sigh of relief as the entrance gate swung open for us and we left those unhappy non-campers in our dust.

Our first trip to Colorado Bend State Park did not disappoint. Just under two hours Northwest of Austin, the short drive is more than worth it. We couldn't believe what we had been missing out on all this time. The park offers some great hiking (our favorite outdoor activity) as well as a range of other activities including fishing, swimming, paddling, bird watching, and even guided cave tours. Located in Bend, Texas, the park literally sits on a bend in the Colorado River. Many of the campsites offer a beautiful view of the slow moving river backed by steep, rocky hills. Every so often we could see a Yucca plant in bloom. The huge yellowish-white blooms, combined with the various other wildflowers and butterflies dotting the landscape, really made it feel like Spring.

View of the lazy Coloroado River from our campsite. Coca the Catahoula basks in the springtime sun. 

View of the lazy Coloroado River from our campsite. Coca the Catahoula basks in the springtime sun. 

Yucca plant in bloom

What's the camping situation? 

The park has two main sections for camping. The biggest camping area is about six miles into the park, near park headquarters. With roughly 50 campsites available in this area (only 15 of which are drive-in) you have to book far in advance to get a weekend reservation when the weather is mild. For our mid-March trip, I made a reservation in early October. We're finding that Spring/Fall weekend camping in Texas requires reservations very far in advance. The reason for this is obvious, but makes last minute camping in most State Parks nearly impossible. We've begun regularly making reservations several months in advance. You can make a reservation at Colorado Bend or any other state park by visiting this link.

The park offers drive-in, walk-in, and group sites. For the drive-in sites, you should expect little to no privacy from your neighbors in the next campsite over. They are very close together and there are no trees in between to offer even a tiny bit of separation. I have to admit we were a little disappointed that our campsite didn't have any trees on which to hang our hammocks.

If you want a little more distance from your fellow campers like we do, the walk-in sites might be a better option. They vary in distance from their designated parking spots but are still fairly close. I would guesstimate no farther than 100 yards at the very farthest for the river area campsites. There still isn't a ton of tree cover to offer privacy, but they are more spread out than the drive-in.

Each campsite has a fire ring and a “lantern holder,” which most people use to hang their trash. There are a few potable water spigots in the area but not at each campsite. There are also a few composting toilets scattered throughout the camping areas but no flush toilets or indoor showers or sinks.

The other main area for camping in the park is the Windmill backpack camping area. These campsites are roughly a mile from parking, do not have river access, and are in a completely different part of the park than the rest of the campsites. We didn't visit this area of the park so we unfortunately cannot comment on these campsites.

And Hiking?

There are over 35 miles of trails in this park and we can't wait to go back so we can piece together a few more. The main trails we hiked were Spicewood Springs trail and Spicewood Springs Canyon. The two trails make a loop that first crisscross over the creek and then follow a ridge that has spectacular views of the creek, the Colorado River, and the surrounding area. At just under 4.5 miles from trailhead to trailhead, this very manageable hike is jam packed with water crossings that make you want to stop and cool off in the emerald green waters.

This hike is listed as challenging on the Park's website and map, but we would characterize it as moderate. It's fairly short, has a few tricky creek crossings, but is mostly flat and shady. We would recommend wearing shoes that you don't mind getting wet. This makes the numerous water crossings less tricky.

One of the first creek crossings on the Spicewood Springs Trail 

Some small waterfalls on the Spicewood Springs trail 

Takeaways:

  • Get out there! This park is well worth the short drive from Austin, even for a day trip. 
  • Book camping reservations far in advance for Spring/Fall weekends
  • For day use, get to the park early to avoid the disappointment of being turned away because the park is full
  • Don't be afraid of the walk-in campsites if you want a little more privacy from other campers
  • The hikes don't require heavy duty hiking boots but we recommend at least wearing waterproof boots or shoes you don't mind getting wet